
AstroShield R-6 insulation is an improved version of Astro Foil‚ designed for HVAC ducts to enhance interior comfort by reducing heat transfer and energy loss‚ ensuring efficient performance.
Overview of AstroShield R-6 Insulation
AstroShield R-6 Insulation is a high-performance‚ flexible thermal insulation material designed for HVAC systems‚ ducts‚ and pipes. It offers an R-6 rating‚ providing excellent thermal resistance to reduce heat loss and improve energy efficiency. Made from durable‚ lightweight materials‚ AstroShield R-6 is easy to handle and install‚ making it ideal for both residential and commercial applications. Its flexible design allows it to conform to irregular shapes‚ ensuring a snug fit around ductwork and pipes. Additionally‚ it is resistant to moisture and mold‚ making it a safe and long-lasting solution for insulating exposed systems. AstroShield R-6 is also formaldehyde-free‚ aligning with environmental and health-conscious standards. Its versatility and effectiveness make it a popular choice for maintaining consistent temperatures and reducing energy costs.
Importance of Proper Installation
Proper installation of AstroShield R-6 Insulation is crucial for ensuring optimal performance and energy efficiency. Incorrect installation can lead to reduced effectiveness‚ higher energy costs‚ and potential safety hazards. It ensures the insulation functions as intended‚ providing consistent thermal resistance and minimizing heat loss. Proper techniques prevent moisture accumulation‚ which can degrade the material and lead to mold growth. Additionally‚ correct installation enhances durability‚ preventing premature wear and tear. It also ensures compliance with safety standards‚ reducing the risk of fire hazards or other dangers. Properly installed insulation maintains its R-6 rating‚ ensuring long-term energy savings and system protection. Neglecting proper installation practices can void warranties and compromise the material’s integrity. Therefore‚ adhering to installation guidelines is essential for maximizing the benefits of AstroShield R-6 Insulation.
Materials Needed for Installation
AstroShield R-6 insulation‚ weatherproof tape‚ utility knife‚ scissors‚ sealant‚ adhesive‚ gloves‚ and safety goggles are essential materials required for proper installation and handling of the insulation.
Tools Required

A utility knife or insulation cutter is necessary for cutting the AstroShield R-6 insulation to size. A tape measure ensures accurate measurements of the area. Scissors or a craft knife can be used for smaller‚ detailed cuts. A staple gun or insulation fasteners are required to secure the insulation in place. Weatherproof tape is needed to seal joints and edges. A sealant‚ such as spray adhesive‚ may be required for additional bonding. Safety goggles and gloves are essential for protecting yourself during installation. A ladder or step stool may be necessary for reaching high areas. A marker or pencil is useful for marking cut lines on the insulation;
Materials to Be Prepared
The materials needed for installing AstroShield R-6 insulation include the insulation rolls or sheets themselves. Weatherproof tape is essential for sealing seams and joints. Insulation fasteners or staples are required to secure the material to ducts or surfaces. A protective jacket or cover may be necessary for added durability. Additionally‚ a vapor barrier or insulation facing might be needed to prevent moisture issues. Ensure all materials are compatible with AstroShield R-6 to maintain its performance and longevity. Proper preparation of these materials is crucial for a successful and efficient installation process.
Preparation Steps
Preparation is key to successful AstroShield R-6 installation. Assess the site‚ organize materials‚ and ensure tools are ready. A well-prepared environment ensures a smooth process.
Site Preparation
Begin by ensuring the installation area is clean and free from debris. Clear any obstructions and inspect the surface for damage or irregularities. Verify that the site is dry‚ as moisture can compromise insulation performance. Ensure proper ventilation to prevent dust buildup during cutting. Check ambient temperature and humidity levels‚ as extreme conditions may affect material integrity. Mark the areas where insulation will be applied‚ using a measuring tape or template for accuracy. Ensure all adjacent surfaces are protected with drop cloths or plastic sheets to prevent damage. Proper site preparation is crucial for a smooth and efficient installation process‚ ensuring the AstroShield R-6 insulation performs optimally.
Tool Preparation
Before starting the installation‚ gather and prepare all necessary tools to ensure efficiency. A utility knife or insulation cutter is essential for cutting the AstroShield R-6 material to size. A measuring tape will help accurately measure the area and material. A staple gun or adhesive-backed straps are required to secure the insulation in place. Additionally‚ a sealant or duct tape is needed to seal joints and gaps. Safety tools like gloves and safety goggles should also be ready to protect against sharp edges and debris. Inspect all tools to ensure they are in good working condition. Dull blades or malfunctioning equipment can hinder progress. Proper tool preparation ensures a smooth and efficient installation process‚ reducing the risk of errors and improving overall results.
Installation Steps
The installation process involves measuring‚ cutting‚ wrapping‚ sealing‚ and securing the insulation. Always follow the manufacturer’s instructions for optimal results. Proper techniques ensure efficiency and effectiveness.
Measuring the Area
Accurate measurements are essential for proper insulation installation. Use a tape measure to determine the length and width of the area or duct where the AstroShield R-6 will be applied. Measure around bends and irregular shapes carefully to ensure a precise fit. Calculate the total area to be insulated and add a small margin for cuts and overlaps. Record the measurements to avoid errors during cutting. Always double-check the dimensions to ensure accuracy. Proper measurement ensures minimal waste and optimal coverage‚ which is critical for energy efficiency and performance.
Cutting the Insulation
Cutting AstroShield R-6 insulation requires precision and care to ensure clean‚ accurate edges. Use a sharp utility knife or insulation-specific cutter to avoid tearing the material. Place the insulation on a stable‚ flat surface and align it with your pre-measured dimensions. Apply steady pressure‚ gliding the blade smoothly through the insulation. For curved or irregular cuts‚ use a template or pattern to guide the knife. Always cut away from your body for safety. After cutting‚ inspect the edges for smoothness and trim any jagged areas with a craft knife or sandpaper. Proper cutting ensures a snug fit and optimal performance of the insulation.
Wrapping the Duct
Wrapping the duct with AstroShield R-6 insulation involves carefully enclosing the ductwork to minimize heat loss and ensure efficiency. Start by aligning the insulation material with the duct’s length‚ ensuring the pre-cut size matches the duct’s circumference. Secure one edge with a small piece of tape to hold it in place. Wrap the insulation snugly around the duct‚ overlapping the edges by 1-2 inches to prevent gaps. Use a utility knife to trim excess material at the seam. For bends or fittings‚ cut the insulation to fit snugly‚ ensuring no wrinkles or air pockets form. Wrap tightly around elbows‚ tees‚ and other fittings‚ securing with insulation tape. This ensures a tight‚ even wrap for optimal performance.
Sealing Joints and Gaps
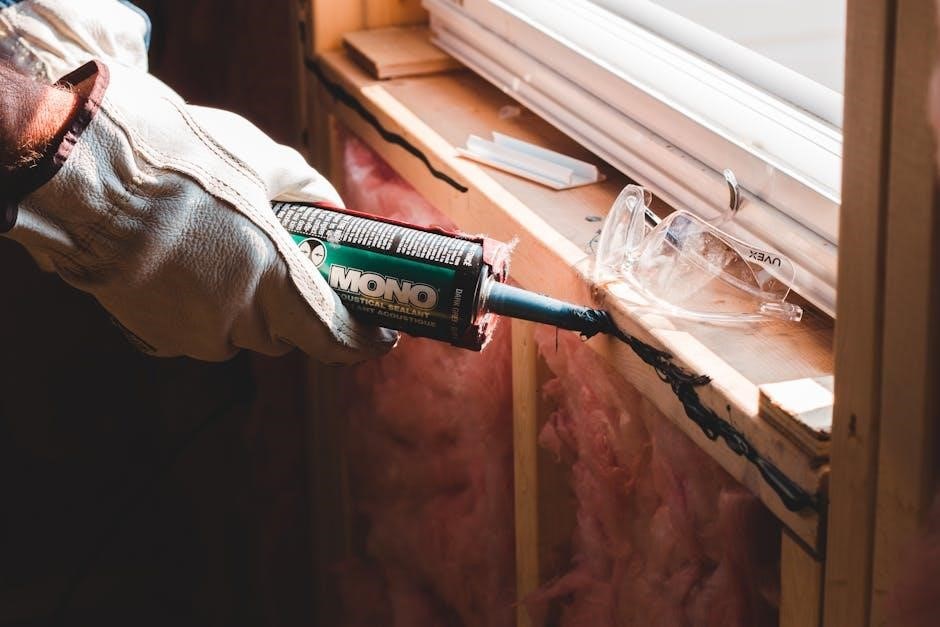
Sealing joints and gaps is critical to ensure the AstroShield R-6 insulation performs effectively. Begin by inspecting all seams‚ connections‚ and edges for any openings. Use a high-quality insulation tape or mastic sealant to cover these areas‚ applying even pressure to create a tight seal. For larger gaps‚ cut a small piece of insulation to fit snugly before sealing. Ensure all seams are overlapping by at least 1 inch and securely fastened. Wrap the edges with additional tape for reinforcement. This step prevents air leaks‚ moisture intrusion‚ and reduces heat transfer. Proper sealing ensures long-term efficiency and durability of the insulation.
Securing the Insulation
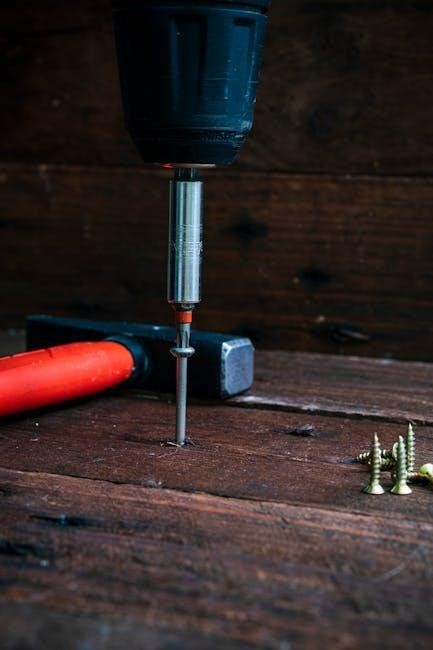
Once the AstroShield R-6 insulation is wrapped and sealed‚ it’s essential to secure it properly to ensure it remains in place. Use metal bands‚ straps‚ or adhesive-backed fasteners to hold the insulation tightly around the ductwork. Tighten the fasteners firmly but avoid over-tightening‚ which could compress or damage the insulation. For areas with higher movement or vibration‚ consider adding extra straps or securing points. Ensure the insulation is snug and evenly distributed to maintain its thermal performance. Avoid leaving loose ends or gaps‚ as this can compromise the insulation’s effectiveness. Finally‚ double-check all fasteners to confirm they are securely attached. Proper securing ensures the insulation remains stable and performs optimally over time.
Final Inspection
The final inspection is a critical step to ensure the AstroShield R-6 insulation is correctly installed and functioning as intended. Begin by visually inspecting the entire duct system to confirm full coverage and proper alignment. Check for any gaps‚ wrinkles‚ or areas where the insulation may not be securely attached. Verify that all seams and joints are tightly sealed and that fasteners are evenly spaced and properly tightened. Ensure the insulation material is not damaged or compressed‚ as this could reduce its thermal performance. Finally‚ review the installation area to confirm it is clean and free of debris. A thorough inspection guarantees the insulation system performs efficiently and meets the desired energy-saving goals.

Safety Precautions
Always work in a well-ventilated area‚ avoid open flames‚ and keep loose clothing tied back. Ensure proper tool usage and maintain a clean workspace.
Handling the Insulation Material
When handling AstroShield R-6 insulation‚ always wear protective gloves‚ goggles‚ and a dust mask to prevent skin irritation and inhalation of fibers. Use a utility knife or insulation cutter to minimize dust generation. Ensure the material is cut on a clean‚ flat surface to avoid contamination. Handle the insulation gently to prevent tearing or compressing the fibers‚ which can reduce its effectiveness. Store the material in a dry‚ well-ventilated area away from direct sunlight. Avoid dragging or stretching the insulation‚ as this may damage the reflective coating. Keep the workspace clean and free from debris to ensure proper installation. Always follow the manufacturer’s guidelines for handling and storage to maintain the product’s integrity and performance.
Protective Gear

Wearing appropriate protective gear is essential when installing AstroShield R-6 insulation to ensure safety and prevent potential health risks. Always use high-quality gloves to protect your hands from sharp edges and irritating fibers. Safety goggles or glasses with side shields are necessary to guard your eyes from debris. A dust mask or respirator should be worn to avoid inhaling airborne particles during cutting or handling. Additionally‚ wear long sleeves and pants to minimize skin exposure. Closed-toe shoes or work boots are recommended to protect feet from heavy objects. Ensure all gear fits properly and remains in good condition to provide adequate protection throughout the installation process.
Best Practices for Safe Installation
Following best practices ensures a safe and efficient AstroShield R-6 insulation installation. Always work in a well-ventilated area to prevent the accumulation of dust and particles. Use tools correctly to avoid damaging the insulation or surrounding surfaces. Regularly inspect materials for any signs of wear or damage before use. Maintain a clean workspace to prevent tripping hazards and ensure accurate measurements. Follow the manufacturer’s guidelines for temperature and environmental conditions. Keep loose clothing and long hair tied back to avoid entanglements with tools. Stay hydrated and take breaks in shaded or cool areas if working in hot conditions. Proper planning and organization are key to minimizing risks and ensuring a successful installation.

Maintenance and Upkeep
Regularly clean AstroShield R-6 insulation to remove dust and debris‚ ensuring optimal performance. Inspect for cracks or dents and repair promptly to maintain efficiency and durability.
Cleaning the Insulation
Cleaning AstroShield R-6 insulation is essential for maintaining its efficiency. Use a soft-bristle brush or a vacuum cleaner with a gentle suction setting to remove loose dust and debris. For stubborn dirt or stains‚ dampen a clean cloth with water and mild detergent‚ but avoid soaking the material. Never use harsh chemicals‚ abrasive cleaners‚ or high-pressure washes‚ as they may damage the insulation’s surface. Regular cleaning prevents dust buildup‚ ensuring proper thermal performance and longevity. Always test a small‚ inconspicuous area first to confirm the cleaning method won’t cause discoloration or damage. Proper maintenance ensures the insulation remains effective and durable over time.
Inspecting for Damage
Regularly inspecting AstroShield R-6 insulation is crucial to ensure its performance and longevity. Begin by visually examining the insulation for tears‚ gaps‚ or water stains‚ which can compromise its thermal efficiency. Check the duct surfaces for signs of moisture or mold‚ as these indicate potential damage. Use a flashlight to inspect hard-to-reach areas‚ such as bends or connections. Ensure all seams and joints are secure and properly sealed. If the insulation has been exposed to extreme conditions‚ like pests or leaks‚ inspect for embedded debris or compression damage. Addressing damage early prevents further deterioration and maintains the insulation’s effectiveness. Regular inspections help identify issues before they escalate‚ ensuring optimal energy efficiency and system performance.
Repairing Damaged Areas
When damage is identified‚ address it promptly to maintain the insulation’s effectiveness. For minor tears or gaps‚ use high-quality patching tape designed for insulation materials. Clean the damaged area thoroughly with a mild detergent to ensure a strong bond. Apply the tape firmly‚ ensuring it covers the entire damaged section without wrinkles. For larger damages‚ such as deep cuts or compression marks‚ cut a replacement piece of AstroShield R-6 insulation to fit the area. Secure it with tape‚ ensuring a snug fit. Inspect the repair to confirm there are no gaps or air leaks. Regular repairs prevent energy loss and maintain the system’s efficiency. Always follow manufacturer guidelines for repair materials to ensure compatibility and longevity.
Frequently Asked Questions
Common inquiries include questions about proper installation techniques‚ troubleshooting insulation gaps‚ and optimizing energy efficiency with AstroShield R-6 for long-term performance.
Common Installation Mistakes
One of the most frequent errors during AstroShield R-6 insulation installation is improper measurement of the duct or surface‚ leading to ill-fitting insulation. Another mistake is failing to compress the insulation material before cutting‚ which can result in uneven thickness. Many installers also overlook the importance of sealing all gaps and joints‚ reducing the overall efficiency of the insulation. Additionally‚ some individuals forget to secure the insulation properly‚ causing it to shift over time. Lastly‚ not conducting a final inspection to ensure all areas are evenly covered is a common oversight. Avoiding these mistakes ensures optimal performance and longevity of the insulation.

Troubleshooting Insulation Issues
When issues arise with AstroShield R-6 insulation‚ start by identifying the root cause. If the insulation appears to be losing efficiency‚ check for gaps or improper sealing. Re-seal any openings with approved adhesive or tape. If the material is damaged‚ inspect for tears or compression marks and replace the affected sections. Ensure the insulation is properly fitted around ducts and corners‚ as poor alignment can reduce performance. If moisture is present‚ inspect for leaks and address them before reinstalling the insulation. Always refer to the manufacturer’s guidelines for repair methods. Addressing these issues promptly ensures the insulation performs optimally and maintains energy efficiency.
Proper installation of AstroShield R-6 insulation is key to maximizing its benefits. By following the outlined steps‚ you ensure energy efficiency‚ reduced heat loss‚ and long-term cost savings. Always prioritize safety‚ use appropriate tools‚ and adhere to manufacturer guidelines. Regular maintenance and inspections will help sustain optimal performance. If issues arise‚ address them promptly to prevent efficiency loss. Remember‚ proper preparation and attention to detail are critical for a successful installation. Review the guide as needed to ensure all steps are correctly executed. With AstroShield R-6‚ you can enjoy a more energy-efficient and comfortable environment for years to come.