
Rubbermaid 7×7 Storage Shed Instructions: A Comprehensive Plan
Embarking on this journey involves careful planning, from initial delivery and placement of materials, to constructing a robust, pressure-treated wood foundation.
This detailed guide chronicles the entire process, documenting a first-time builder’s experience with a significant backyard project, including root clearing and gravel filling.
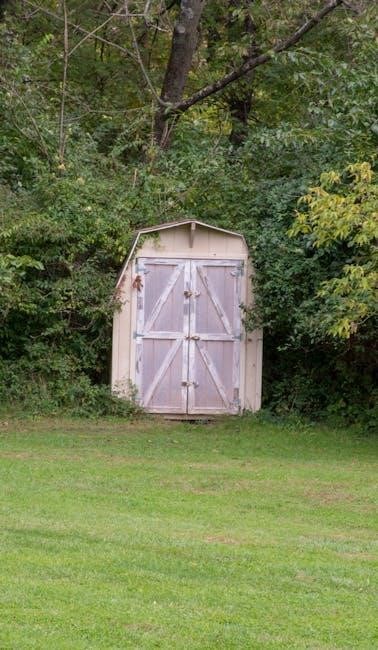
The Rubbermaid 7×7 shed represents a popular choice for homeowners seeking reliable and durable outdoor storage solutions. Its manageable size makes it ideal for a variety of yards, offering ample space without overwhelming the landscape. This shed isn’t just a storage container; it’s a versatile addition capable of housing gardening tools, seasonal decorations, lawn equipment, and much more, effectively decluttering garages and homes.
This comprehensive guide is designed to walk you through each stage of the assembly process, from unboxing the components to adding the finishing touches. Whether you’re a seasoned DIY enthusiast or tackling your first major project, these instructions will provide clear, step-by-step guidance. The journey begins with receiving the materials and carefully moving them to the designated backyard location, setting the stage for a rewarding building experience.
Expect a commitment to precision, particularly when framing the pressure-treated wood foundation, a crucial element for long-term stability. This project, as documented in a recent build series, is a testament to the fact that even first-time builders can achieve professional results with patience and attention to detail.
Unboxing and Inventory
Upon delivery of your Rubbermaid 7×7 shed, the initial step is a meticulous unboxing and inventory process. Carefully inspect all packages for any visible damage incurred during shipping. Document any discrepancies immediately with the retailer. This proactive approach can save significant time and frustration later in the assembly.
Systematically open each box, laying out the components in an organized manner. Refer to the parts list (detailed in the following section) to verify that all items are present. Don’t discard any packaging until you’re confident everything is accounted for – small parts are often hidden within protective materials.
This initial inventory isn’t just about quantity; it’s about familiarizing yourself with the various parts. Understanding what each component is and how it fits into the overall structure will greatly simplify the subsequent assembly stages. A well-organized unboxing sets the foundation for a smooth and successful build.
Checking the Parts List
The Rubbermaid 7×7 shed package includes a comprehensive parts list, crucial for verifying you have everything needed before commencing assembly. This list details each component – wall panels, roof sections, floor pieces, hardware packs, and smaller trim elements – with corresponding quantities and often, identifying codes.
Carefully compare the physical components you unpacked with the items listed. Don’t assume a missing part is a simple oversight; it’s better to address it immediately with the supplier. Pay close attention to hardware – screws, bolts, and connectors – as these are easily misplaced or overlooked.
Utilize a checklist, marking off each item as you confirm its presence. This methodical approach prevents errors and ensures a stress-free build. A complete and verified parts list is your first line of defense against delays and complications during construction.
Identifying Hardware Components
The Rubbermaid 7×7 shed utilizes a variety of hardware, each serving a specific purpose during assembly. Familiarizing yourself with these components is vital for a smooth build process. Expect to find different screw types – wood screws, self-tapping screws – alongside bolts, washers, and potentially, specialized connectors.
Hardware is typically packaged in labeled bags, but these labels can sometimes be unclear. Refer to the parts list and diagrams in the instruction manual to correctly identify each item. Pay attention to screw head types (Phillips, flathead) and lengths, as using the wrong size can damage the shed components.
Organize the hardware into separate containers or labeled bags to prevent confusion during assembly. This proactive step saves time and frustration, ensuring you always have the correct fastener readily available when needed throughout the construction phases.
Site Preparation
Proper site preparation is paramount for a durable and long-lasting Rubbermaid 7×7 shed. Begin by carefully assessing the chosen location, ensuring it meets the shed’s dimensional requirements with ample surrounding space for maneuvering during construction. Removing any existing vegetation, rocks, and debris is crucial for creating a stable base.
Consider drainage patterns to prevent water accumulation around the shed’s foundation. Avoid low-lying areas prone to flooding. The ground must be leveled, and a foundation prepared to support the shed’s weight and withstand environmental factors.
Initial steps involve clearing roots and digging for the foundation, often requiring significant effort. A well-prepared site ensures the shed remains square, level, and structurally sound for years to come, avoiding future issues.
Choosing the Right Location
Selecting the ideal location for your Rubbermaid 7×7 shed is a critical first step. Prioritize a spot that offers convenient access while minimizing disruption to your yard’s aesthetics and functionality. Ensure the location complies with local zoning regulations and homeowner association rules regarding setbacks and building permits.
Consider proximity to your house for easy access to stored items, but avoid placing the shed directly under trees to prevent damage from falling branches or accumulating debris. A level area is essential, reducing the amount of ground preparation needed later.
Evaluate drainage patterns; avoid areas prone to waterlogging. Sunlight exposure should also be considered, as excessive heat can impact the shed’s interior temperature.
Leveling the Ground
Achieving a perfectly level base is paramount for a stable and long-lasting Rubbermaid 7×7 shed. Begin by thoroughly clearing the chosen area of all vegetation, rocks, and debris. Utilize a long level and straight edge to identify high and low spots across the foundation area.

For minor imperfections, soil can be moved from higher areas to fill in lower ones, compacting each layer firmly. Significant slopes may require more extensive excavation or the addition of fill material, like gravel or crushed stone.
Regularly check for level in multiple directions, ensuring both front-to-back and side-to-side consistency. A level foundation prevents structural stress and ensures proper door operation.
Preparing the Foundation Area
Once the location is finalized, meticulous preparation of the foundation area is crucial. This involves removing all topsoil, grass, and organic matter down to firm, undisturbed ground. The area should extend at least six inches beyond the shed’s perimeter on all sides to accommodate the foundation framing.
Carefully inspect the exposed soil for large rocks or roots, removing them as needed. Addressing these obstructions now prevents future settling issues. Consider the natural drainage of the area; slight grading away from the shed can help manage water runoff.
Compacting the soil with a plate compactor is highly recommended, creating a dense and stable base for the foundation. This step minimizes settling and ensures the shed remains level over time.
Foundation Construction
Building a solid foundation is paramount for the longevity and stability of your Rubbermaid 7×7 shed. Utilizing pressure-treated wood is essential to resist rot and insect damage when in contact with the ground. Framing the foundation requires precise cuts and secure connections, typically using galvanized screws or nails.
The frame should precisely match the shed’s dimensions, ensuring a snug fit. Digging a shallow hold for the wood and filling it with pea gravel provides excellent drainage and further protects the wood. Maintaining squareness during construction is critical; use a framing square and check diagonals to verify accuracy.
Regularly check for level throughout the framing process, making adjustments as needed. A level foundation guarantees a plumb and stable shed structure.
Pressure-Treated Wood Foundation Framing
Constructing the foundation frame with pressure-treated lumber is a crucial first step. This wood resists decay and insect infestation, vital for ground contact. Begin by cutting the lumber to the exact dimensions required for a 7×7 foot square, ensuring precise angles for tight corners.
Assemble the frame using galvanized screws or nails, designed for outdoor use and preventing rust. Double-check squareness frequently with a framing square, measuring diagonals to confirm equal lengths. A perfectly square frame is essential for a level and stable shed.
Consider adding internal support beams within the frame for increased strength, especially if the ground is uneven. Proper framing provides a robust base for the entire shed structure, ensuring years of reliable use.
Digging and Gravel Base Installation
Preparing the site involves carefully excavating the area for the foundation, accounting for the depth needed for both the frame and a gravel base. This process may require removing roots and vegetation, ensuring a clear and level surface. Accurate digging is paramount for a stable shed.
Once excavated, lay down a generous layer of pea gravel, typically 4-6 inches deep. This gravel provides excellent drainage, preventing water from pooling around the foundation and causing rot. Compact the gravel thoroughly using a hand tamper or plate compactor.
A well-compacted gravel base ensures a solid and level foundation, distributing the shed’s weight evenly and minimizing settling over time. This step is critical for long-term shed stability and preventing structural issues.
Ensuring Foundation Squareness and Level
Achieving perfect squareness is vital for a structurally sound shed. Utilize the 3-4-5 triangle method – measure 3 feet along one side, 4 feet along the adjacent side, and the diagonal should measure exactly 5 feet. Adjust the frame until this holds true.
Leveling the foundation is equally crucial. Employ a long level, checking across multiple points of the frame. Use shims or add/remove gravel beneath the frame to correct any unevenness. Consistent leveling prevents wobbling and ensures proper door operation.

Regularly re-check both squareness and level throughout the foundation construction process. Small adjustments early on prevent significant problems later. A solid, square, and level foundation is the bedrock of a durable Rubbermaid shed.
Floor Assembly
Begin by carefully unpacking and laying out the floor panels. Ensure you have all necessary components before starting assembly. Refer to the parts list to verify quantities and identify each panel correctly.
Connect the floor panels according to the manufacturer’s instructions, typically using provided connectors or screws. Ensure a tight, flush fit between each panel to create a solid base. Pay close attention to alignment, as this impacts the entire shed’s stability.
Once assembled, carefully position the floor frame onto the prepared foundation. Secure it firmly using appropriate fasteners, ensuring it’s anchored to the pressure-treated wood. A well-assembled and secured floor is essential for a long-lasting shed.
Attaching the Floor Panels
The initial step involves precisely aligning the floor panels, ensuring they interlock seamlessly. Utilize the provided connectors – often a snap-fit design or screws – to join the panels together. Double-check for squareness during this process; a slightly off alignment here will compound issues later.
Apply consistent pressure when connecting the panels, guaranteeing a tight and secure bond. Avoid over-tightening screws, which could strip the material. Work methodically, connecting each panel to its adjacent counterparts, building the floor section by section.
Inspect the assembled floor for any gaps or misalignments. Address these immediately before proceeding, as correcting them later will be significantly more difficult. A solid, well-connected floor is the foundation of your Rubbermaid shed.
Securing the Floor to the Foundation
With the floor panels assembled, carefully position the entire structure onto the prepared foundation. Precise alignment is crucial at this stage, ensuring the shed sits squarely on the base. Use shims if necessary to compensate for any minor imperfections in the foundation’s levelness.
Utilize appropriate fasteners – typically screws or specialized anchors – to secure the floor to the pressure-treated wood framing. Follow the manufacturer’s instructions regarding fastener type and spacing. Ensure the fasteners penetrate deeply into the foundation framing for a robust connection.
Regularly check for level as you secure the floor, making adjustments as needed. A firmly anchored floor prevents shifting and ensures the shed’s long-term stability and structural integrity. This step is paramount for a durable build.
Wall Construction
Begin wall construction by carefully assembling the pre-fabricated wall panels. These panels typically interlock or connect using a straightforward system, designed for ease of assembly. Ensure each connection is secure before proceeding, referencing the Rubbermaid instructions for specific guidance.
Pay close attention to the orientation of each panel, verifying that door and window openings align correctly with the planned layout. Once assembled, carefully lift and position the first wall panel onto the secured floor.
Temporary bracing is essential during this phase, preventing the wall from shifting or collapsing before it’s fully secured. Use 2x4s or similar supports to maintain plumb and squareness throughout the process. This ensures a structurally sound shed.
Assembling the Wall Panels
The initial step in wall construction involves laying out all wall panels on a flat, protected surface. This prevents damage during assembly and allows for easy access to all components. Carefully inspect each panel for any shipping damage before beginning.
Referencing the Rubbermaid manual is crucial; it details the specific interlocking mechanisms or connection points for each panel. Typically, these involve sliding panels into grooves or securing them with provided hardware.
Ensure proper alignment as you connect the panels, checking for squareness at each stage. A slight misalignment early on can compound into larger issues later. Use clamps to hold panels together while securing them with screws or bolts, as indicated in the instructions.
Attaching Walls to the Floor
With the wall panels assembled, carefully lift and position them onto the prepared floor base. This stage often requires assistance, as the panels can be unwieldy. Ensure the walls are aligned with the edges of the floor, maintaining a flush fit.
The Rubbermaid instructions will specify the fastening method – typically screws or bolts – and their placement along the floor perimeter. Pre-drilling pilot holes can prevent splitting the wall panels, especially with composite materials.
Prioritize securing the corners first, as these establish the overall squareness of the structure. Then, systematically attach the remaining wall sections, frequently checking for plumb and level. A properly secured connection to the floor is vital for the shed’s stability.
Ensuring Wall Plumb and Square
Achieving perfectly plumb and square walls is crucial for a structurally sound and aesthetically pleasing Rubbermaid shed. Utilize a level along both the vertical and horizontal planes of each wall panel during attachment.
Diagonal measurements are essential for verifying squareness; these should be equal from corner to corner. If discrepancies exist, gently adjust the wall panels until the measurements align. Temporary bracing can hold walls in position while securing them.
Consistent checking throughout the process prevents cumulative errors. A slightly out-of-square shed can lead to issues with door and roof installation. Patience and precision at this stage will save significant headaches later on.
Roof Installation
Commencing roof installation requires careful attention to detail for weather protection and structural integrity. Begin by securely installing the roof supports, ensuring they are evenly spaced and firmly attached to the wall panels.
Next, carefully position and attach the roof panels, overlapping them correctly according to the manufacturer’s instructions. Utilize appropriate fasteners designed for outdoor use to prevent corrosion and ensure a lasting hold.
Prioritize securing the entire roof structure, paying close attention to corners and edges. A well-secured roof resists wind uplift and prevents water intrusion, safeguarding your stored items. Double-check all connections for tightness and stability.

Installing Roof Supports
Proper roof support installation is crucial for the shed’s long-term stability and ability to withstand weather elements. Begin by accurately measuring and marking the locations for each roof support beam on the top of the wall panels.
Ensure each support is perfectly aligned and level before fastening it securely. Use appropriate screws or bolts, pre-drilling holes to prevent wood splitting. Consistent spacing between supports is vital for even weight distribution.
Reinforce connections with metal brackets where necessary, especially at joints and corners. Regularly check for plumb and level throughout the installation process, making adjustments as needed to guarantee a solid foundation for the roof panels.
Attaching Roof Panels
Carefully lift and position the first roof panel onto the installed roof supports, ensuring it aligns perfectly with the shed’s walls. Begin securing the panel with the designated screws or fasteners, starting from one corner and working your way across.
Maintain consistent spacing between fasteners to distribute the load evenly and prevent warping. Overlap subsequent roof panels according to the manufacturer’s instructions, creating a watertight seal.
Pay close attention to any pre-drilled holes or designated attachment points. Regularly check for level and alignment as you attach each panel, making minor adjustments as needed. Seal any gaps or seams with appropriate weather-resistant sealant.
Securing the Roof Structure
Once all roof panels are in place, reinforce the entire structure with additional bracing or supports as recommended by Rubbermaid. This often involves installing angled supports connecting the roof to the walls, enhancing stability against wind and weather.
Inspect all fasteners – screws, nails, or bolts – ensuring they are securely tightened. Consider adding metal connectors at key joints for increased strength and durability.
Pay particular attention to areas prone to stress, such as corners and overhangs. A well-secured roof is crucial for protecting your stored items from the elements and ensuring the shed’s longevity. Double-check all connections before considering the roof complete.
Door Installation
Begin by carefully preparing the door opening, ensuring it’s square and free of any obstructions. This is a critical step for smooth door operation. Inspect the door frame components for any damage sustained during shipping or assembly.
Next, carefully hang the door within the prepared opening, utilizing the provided hinges and hardware. Ensure the door swings freely and aligns correctly with the frame.
Adjust the door alignment as needed, using shims or adjustments on the hinges. A properly aligned door will close securely and prevent drafts or water intrusion. Finally, install any included locking mechanisms or handles, completing the door installation process.

Preparing the Door Opening
Before hanging the door, meticulous preparation of the opening is essential. Begin by verifying the opening’s dimensions against the door specifications, ensuring a precise fit. Check for any warping or inconsistencies in the surrounding wall panels.
Carefully inspect the door frame area for any protruding nails, screws, or debris that could hinder door installation. Remove any obstructions to create a smooth and even surface for the door to rest against.
Confirm the opening is perfectly square using a level and measuring tape. Adjustments may be necessary to ensure proper door alignment and functionality; A well-prepared opening guarantees a secure and weather-tight closure.
Hanging the Door

With the opening prepared, carefully lift the door into position, aligning the hinges with the pre-drilled holes or designated mounting points on the door frame. Utilize assistance to manage the door’s weight and prevent damage during installation.
Secure the hinges using the provided hardware, ensuring screws are tightened firmly but not over-tightened to avoid stripping the wood or plastic. Begin with the top hinge, then the bottom, and finally any intermediate hinges.
Periodically check for plumb and alignment as you attach each hinge. A properly hung door should swing freely and close securely, creating a weather-resistant seal. Take your time and double-check each step for optimal results.
Adjusting Door Alignment
After hanging, carefully inspect the door’s operation. Observe how it closes – does it latch easily? Are there any gaps around the frame? These observations will guide necessary adjustments for optimal performance.
Minor adjustments can often be made by slightly loosening and re-tightening the hinge screws. This allows for subtle shifts in the door’s position. Shim the hinges if needed, using thin pieces of wood or plastic to correct alignment issues.
Pay close attention to both horizontal and vertical alignment. A door that binds or doesn’t latch properly can compromise security and weather resistance. Patience and incremental adjustments are key to achieving a smooth, secure closure.
Vent Installation
Proper ventilation is crucial for maintaining a dry and healthy environment within your Rubbermaid shed, preventing moisture buildup and potential damage to stored items. Locate the designated vent openings, typically near the roofline or gable ends.
Install the provided vents according to the manufacturer’s instructions, ensuring a snug and secure fit. Use appropriate screws or fasteners to attach them firmly to the shed walls. Consider the prevailing wind direction when positioning vents for optimal airflow.
Check for any gaps around the vent frames and seal them with caulk to prevent water intrusion. Adequate ventilation extends the life of your shed and protects your belongings from mold and mildew.
Finishing Touches
With the core structure complete, it’s time to personalize and refine your Rubbermaid 7×7 shed. Consider installing shelving units to maximize storage space and organization, tailoring the interior to your specific needs. These are often optional additions, allowing for customization.
Inspect the entire shed for any remaining gaps or imperfections, addressing them with appropriate sealant or fasteners. Adding extra reinforcements to key structural points can further enhance stability and longevity, especially in areas prone to high winds or heavy snow.
A final walk-around ensures everything is secure and functioning correctly, completing your project and providing a durable, organized storage solution for years to come.
Installing Shelving (Optional)
Enhance your Rubbermaid 7×7 shed’s functionality with optional shelving, maximizing vertical storage space. Begin by planning the shelf layout, considering the items you intend to store and their weight distribution. Utilize sturdy shelving units designed for shed environments, capable of withstanding temperature fluctuations and humidity.
Securely attach shelving supports to the shed walls using appropriate screws and anchors, ensuring they are level and properly aligned. Distribute weight evenly across the shelves to prevent sagging or instability. Consider adjustable shelving for greater flexibility in accommodating various item sizes.
This customization step transforms the shed into a highly organized storage solution, tailored to your specific needs and preferences, adding significant value to your outdoor space.
Adding Additional Reinforcements
For enhanced durability and longevity of your Rubbermaid 7×7 shed, consider adding supplemental reinforcements, particularly in regions prone to severe weather conditions. Focus on strengthening key structural points, such as wall connections and roof supports, to withstand strong winds and heavy snow loads.
Utilize metal brackets and strapping to reinforce corners and joints, providing added stability and resistance to racking. Inspect the shed regularly for any signs of stress or weakness, addressing them promptly with additional support. This proactive approach safeguards your investment and ensures the shed remains secure for years to come.
These preventative measures contribute to a robust and reliable storage solution, protecting your belongings from the elements and providing peace of mind.